.png)
Your Peloton bike's belt tension affects every ride, from easy recovery sessions to intense power zone workouts.
When the tension is wrong, riders experience belt slipping during high resistance efforts, making workouts less effective and potentially unsafe.
The good news is that adjusting belt tension is a simple fix that takes just a few minutes with basic tools and can solve most slipping issues.
Many Peloton owners face belt slipping problems, especially during high-output rides where the belt can't grip properly under heavy load.
This guide walks through everything needed to diagnose tension problems, make proper adjustments, and maintain optimal belt performance.
Whether dealing with a brand new bike that needs initial setup or an older model requiring maintenance, getting the tension just right ensures smooth, slip-free rides at any resistance level.
Key Takeaways
- Proper belt tension prevents slipping during high-resistance workouts and keeps rides safe and effective
- Belt tension adjustments require only basic tools and can be completed in minutes using quarter-turn increments
- Regular testing and maintenance help identify tension issues before they affect workout performance
Why Peloton Belt Tension Matters
Getting belt tension right affects workout quality, prevents equipment damage, and stops common issues like slipping and noise.
Both loose and tight belts create problems that hurt the riding experience.
Impact on Workout Performance
Proper belt tension keeps the Peloton bike running smoothly during rides.
When tension is too loose, belt slipping occurs at high resistance levels above 80.
This slipping ruins workout flow.
Riders lose power transfer when pedaling hard.
The belt skips instead of gripping the flywheel properly.
Performance issues from poor tension:
- Power loss - Energy doesn't transfer from pedals to flywheel
- Inconsistent resistance - Belt slips make workouts unpredictable
- Noise problems - Loose belts create squeaking and grinding sounds
- Safety concerns - Sudden slipping can cause riders to lose balance
Tight belts also hurt performance.
They create too much friction on the drive system, making pedaling feel jerky and unnatural.
The bike feels sluggish when belt tension is too high.
Riders work harder but get less smooth motion from their effort.
Effects on Peloton Bike Longevity
Belt tension directly affects how long Peloton bikes last.
Wrong tension wears out parts faster than normal use.
Loose belts damage the flywheel and drive components.
The slipping motion creates heat and friction in the wrong places.
This breaks down metal parts over time.
Damage from loose belts:
- Flywheel bearing wear
- Drive pulley damage
- Belt fraying and cracking
- Motor strain from inconsistent load
Tight belts put constant pressure on bearings and seals.
The extra force makes these parts fail sooner.
The belt itself wears out faster with wrong tension.
Loose belts develop cracks from constant flexing.
Tight belts get thin spots from too much pressure.
Common Problems Resulting from Improper Tension
Users report specific problems when belt tension goes wrong.
Pedal slipping at high resistance happens most often with loose belts.
Many new bike owners need to adjust tensioners significantly right after delivery.
Some require 20-30 quarter turns to stop slipping.
Riders also experience inconsistent metrics when tension is wrong.
The bike can't measure power accurately if the belt slips during measurement.
Some users notice the bike shaking or vibrating more with poor tension.
This happens because the belt doesn't run smoothly on the pulleys.
These problems get worse over time if riders don't fix them quickly.
Recognizing and Diagnosing Belt Tension Issues

Proper belt tension keeps your Peloton bike running smoothly and prevents premature wear.
A belt that's too loose will slip during intense rides, while an overly tight belt creates unnecessary strain on components.
Signs of Loose or Tight Belt Tension
A loose belt on a Peloton bike creates several noticeable problems during workouts.
The most obvious sign is belt slippage during high-resistance pedaling, where the pedals feel like they're spinning freely despite heavy resistance settings.
Riders often notice inconsistent resistance levels when the belt tension is too loose.
The bike may feel easy to pedal even at moderate resistance settings.
This happens because the belt can't maintain proper grip on the flywheel.
Signs of loose belt tension include:
- Pedal slippage at high resistance (80+ levels)
- Inconsistent resistance response
- Belt visible sagging when viewed from below
- Unusual clicking sounds during pedaling
Overly tight belt tension creates different problems.
The bike becomes harder to pedal at all resistance levels.
Users may hear grinding or squealing noises during workouts.
A tight belt puts extra stress on the bike's bearings and motor.
This can lead to premature component failure and expensive repairs.
Identifying Belt Slippage and Squeaks
Belt slippage occurs when the belt loses grip on the flywheel during pedaling.
This typically happens during high-intensity intervals or when standing out of the saddle.
The pedals suddenly become easy to turn despite high resistance settings.
Common slippage scenarios:
- During sprint intervals at 80+ resistance
- When transitioning from seated to standing positions
- After extended use without maintenance
- In humid environments where belts may stretch
Squeaking noises often indicate belt alignment or lubrication issues.
These sounds typically occur at specific pedal positions rather than continuously.
A rhythmic squeak that matches pedal cadence usually points to belt problems.
Random squeaks may indicate other mechanical issues not related to belt tension.
Some squeaks resolve temporarily when pedaling backward.
This suggests the belt is slightly misaligned or has debris causing friction.
How to Check Belt Alignment
Proper belt alignment ensures smooth operation and prevents uneven wear.
A misaligned belt will drift to one side of the pulleys and create unusual wear patterns.
Visual inspection provides the first clue about alignment issues.
The belt should run straight down the center of both pulleys without touching the sides.
Steps to check alignment:
- Power down the bike completely
- Remove the rear cover panel
- Examine belt position on both pulleys
- Look for uneven wear patterns on belt edges
- Check for debris around pulleys
Belt alignment problems often cause the belt to come off the tensioner during forward pedaling.
This serious issue requires immediate attention.
A properly aligned belt maintains consistent contact with both pulleys.
Tools and Safety Precautions for Adjusting Peloton Belt Tension
Proper belt tension adjustment requires specific tools and careful safety steps to protect both the user and the equipment.
The process involves powering down the bike completely and gathering the right tools before making any adjustments.
Essential Tools: Allen Wrench and More
The primary tool needed for Peloton belt adjustments is a 6mm Allen wrench.
This tool comes in the toolkit that ships with every Peloton bike.
Users should locate their original Peloton toolkit before starting any maintenance.
The 6mm size is specifically designed for the belt tensioning screws on Peloton equipment.
Additional helpful tools include:
- Clean cloth for wiping down components
- Flashlight or phone light for better visibility
- Work gloves for better grip and protection
The Allen wrench must fit snugly into the tensioning screws.
A loose fit can strip the screw heads and cause permanent damage.
Powering Down and Safety Steps
Safety begins with completely powering down the Peloton bike.
Users must press and hold the power button until the screen goes black.
The next step involves unplugging the power cord from the wall outlet.
This prevents any accidental startup during maintenance work.
Wait at least 30 seconds after unplugging before touching any components.
This allows electrical systems to fully discharge.
Never attempt belt adjustments while the bike has power.
The belt and flywheel can move unexpectedly and cause serious injury.
Check that the pedals can rotate freely by hand.
Any resistance indicates the bike still has residual power.
Preparing Your Peloton Bike for Adjustment
Position the Peloton bike on a flat, stable surface with adequate lighting.
Clear at least three feet of space around all sides for safe movement.
Remove any water bottles, towels, or accessories from the bike frame.
These items can interfere with the adjustment process or fall during work.
Locate the belt tensioning points on the bike.
These are typically found near the flywheel housing and require removing a protective cover.
Inspect the belt visually for any obvious damage like cracks or fraying.
Damaged belts need replacement rather than tension adjustment.
Position the Allen wrench and other tools within easy reach.
Having everything ready prevents stopping mid-adjustment to search for equipment.
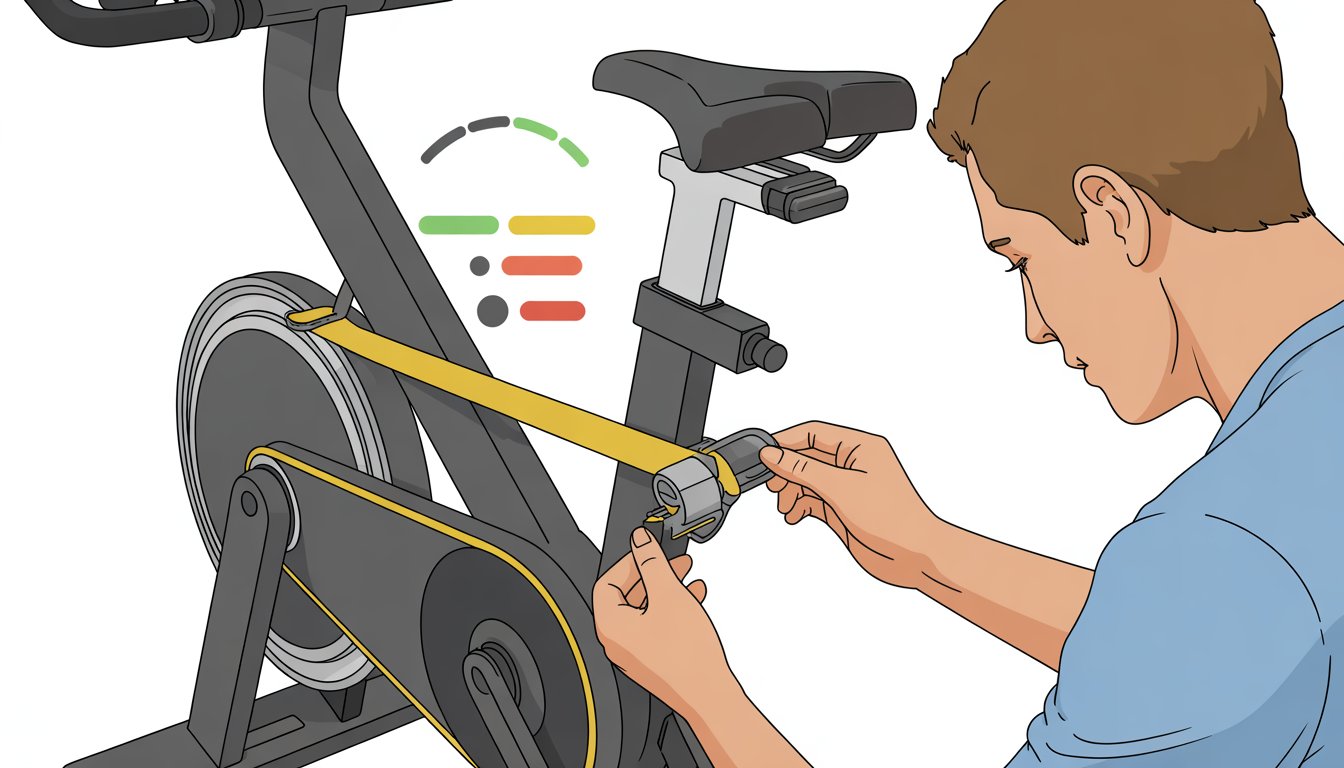
Step-By-Step Guide to Adjusting Peloton Belt Tension
Proper belt adjustment requires accessing the tensioning mechanism with an allen wrench, making small quarter-turn adjustments, and checking that the belt runs straight down the center of the deck.
Accessing the Tensioning Mechanism
The first step involves safely preparing the Peloton for maintenance work.
Users must power down and unplug the Tread before beginning any adjustments.
The toolkit that comes with every Peloton contains the necessary tools.
A 6mm allen key is the primary tool needed for belt tension adjustments.
For bike models, the belt guard needs removal to access the tensioning components.
The belt must be popped off the pulleys to reach the idler pulley's locking screw.
Tread models have tensioning screws located along the sides of the deck.
These screws are visible once the safety key is removed and the unit is properly shut down.
Safety Note: Never attempt adjustments while the machine is powered on or plugged in.
Adjusting Belt Tension Correctly
Belt tension adjustments require small, precise movements to avoid over-tightening. Each screw should be tightened one quarter turn clockwise at a time.
For bike models, the threaded rod that controls the idler pulley needs adjustment. A quick tweak of 1/4 to 1/2 a turn with fingers is usually sufficient.
Some new bikes may require more extensive adjustments. One user reported needing 20-30 quarter turns on a brand new bike to eliminate slipping.
Testing Process:
- Make small adjustments
- Reassemble components
- Test at various resistance levels
- Repeat if slipping continues
The goal is to eliminate slipping without creating excessive tension that could damage components.
Ensuring Proper Belt Alignment
Belt alignment prevents uneven wear and reduces noise during operation. The belt should run straight down the middle of the deck without drifting to either side.
Tread alignment follows a simple principle. Users should turn the opposite side of the direction that the belt is drifting.
If the belt moves right, adjust the left tensioning screw.
Alignment Check Steps:
- Power on the machine
- Run at slow speed
- Observe belt tracking
- Make small adjustments as needed
For bike models, proper alignment ensures the belt sits correctly on all pulleys. Misalignment can cause noise and premature wear of belt components.
Regular monthly checks help maintain proper alignment and tension. Loose belts can stick or slip during normal use, affecting workout quality and potentially damaging the equipment.
Testing and Fine-Tuning for the Perfect Tension
Getting the right belt tension requires careful testing and small adjustments. Users need to check how the belt feels during pedaling and listen for unusual sounds that signal problems.
How to Test for Optimal Belt Tension
The most reliable way to test belt tension involves checking resistance at different levels. Users should pedal at medium resistance first to feel baseline tension.
A properly tensioned belt allows smooth pedaling without slipping. The pedals should engage immediately when pressure is applied.
Testing at high resistance reveals belt slippage issues. If the pedals slip or feel disconnected from the flywheel, the belt needs tightening.
Key Signs of Proper Tension:
- No pedal slipping at any resistance level
- Smooth engagement when starting to pedal
- Consistent feel throughout the resistance range
Users can also check belt tension using tuning apps that measure frequency when the belt is plucked. The Gates Bicycle Belt Tension App provides accurate readings for this method.
Making Minor Adjustments
Small adjustments work better than large changes when fine-tuning belt tension. Users should make quarter-turn adjustments to the tensioner bolts.
After each small adjustment, test the pedaling feel immediately. This prevents over-tightening which can damage the belt or bearings.
Adjustment Steps:
- Turn tensioner bolts a quarter turn clockwise to tighten
- Test pedaling at different resistance levels
- Make additional quarter turns if needed
- Stop when pedaling feels smooth without slipping
The Peloton tensioner adjustment process helps eliminate pedal dropout and belt slippage effectively. Users should work slowly and test frequently.
Too much tension creates excessive wear on components. The belt should have slight give when pressed but not feel loose.
Observing Noise and Performance After Adjustment
A properly adjusted belt runs quietly during normal use. Squeaking or grinding sounds indicate tension problems that need attention.
Performance should feel consistent across all resistance levels after adjustment. Any dead spots or sudden changes in feel suggest the belt needs more work.
Users should ride for 10-15 minutes after making adjustments. This allows the belt to settle into its new tension level.
If problems persist after fine-tuning, the belt may need replacement or professional service.
Maintenance, Troubleshooting, and Support Resources
Regular belt maintenance prevents most tension issues before they start. Knowing when to contact professional help protects both your investment and safety.
Understanding warranty coverage ensures you get the support you need without voiding protection.
Routine Belt Maintenance Tips
The Peloton tread belt comes lubricated from the factory and requires no additional lubrication for three years. This factory preparation eliminates immediate maintenance concerns.
Visual inspections should happen before each workout. Users should check for debris, uneven wear patterns, or visible damage to the belt surface.
Belt alignment checks prevent major issues. The belt should run straight down the middle of the deck without drifting to either side during operation.
Cleaning protocols keep the belt functioning properly:
- Wipe down the belt with a damp cloth after each use
- Remove shoes before stepping on the belt
- Keep the area around the treadmill free of dust and debris
Tension monitoring helps catch problems early. Users can lift the belt from the center—it should move 2-3 inches easily.
Monthly maintenance includes checking all visible bolts and connections. Any loose hardware should be addressed immediately to prevent belt misalignment.
When to Contact Peloton Support
Belt slipping during workouts indicates professional attention is needed. This problem often stems from internal tension mechanisms that require expert adjustment.
Persistent squeaking or grinding noises signal potential component wear. These sounds may indicate issues beyond simple belt adjustment that need professional diagnosis.
Uneven belt wear patterns suggest alignment problems that users cannot fix safely. Professional technicians have specialized tools for proper belt positioning.
When basic adjustments fail to resolve tension issues, professional help prevents further damage. Continued DIY attempts may void warranty coverage.
Users should contact support for:
- Belt damage or cracking
- Motor-related noises
- Electronic display errors
- Any safety concerns during operation
Emergency situations require immediate contact with Peloton support. These include sudden belt stops, unusual burning smells, or electrical issues.
Preserving Your Warranty and Bike Longevity
Peloton warranty coverage protects users from unexpected repair costs. The frame carries a 5-year warranty, while components and labor receive 12-month coverage.
DIY repairs beyond basic maintenance can void warranty protection. Users should document all maintenance activities and avoid disassembling internal components.
ComponentWarranty PeriodFrame5 yearsBelt & Components12 monthsLabor12 months
Professional servicing through authorized technicians maintains warranty validity. These experts understand proper procedures and use genuine parts.
Regular maintenance extends bike life significantly. Following manufacturer guidelines prevents premature wear and costly repairs.
Protection plans offer additional coverage beyond standard warranty periods. These plans include accidental damage protection and extended service coverage.
Proper storage conditions protect internal components. Users should maintain stable temperatures and humidity levels in workout areas.
Frequently Asked Questions
Belt tension issues often stem from improper adjustment techniques and timing. Most problems can be resolved with basic tools and monthly maintenance checks.
What is the recommended procedure for adjusting the belt tension on a Peloton bike?
The procedure involves using a 6mm Allen key to access the tensioner assembly. Users should power down the bike completely before making any adjustments.
Turn the tensioning screws clockwise in quarter-turn increments. This gradual approach prevents over-tightening the belt system.
Adjusting chain or belt drive tension requires careful attention to eliminate pedal dropout. Test the resistance after each adjustment to ensure proper function.
How can I tell if my Peloton Tread belt is too loose or too tight?
A loose belt will stick or slip during running or walking workouts. Users may notice inconsistent movement or unusual sounds from the motor area.
An overly tight belt creates excessive strain on the motor and drive components. This can cause premature wear and potential mechanical failure.
Monthly belt tension checks help identify problems before they become serious. The belt should move smoothly without slipping or binding.
What steps should I follow to properly calibrate my Peloton Tread?
Power down and unplug the Tread before starting any calibration work. Use the included 6mm Allen key from the toolkit for adjustments.
Tighten each tensioning screw one quarter turn clockwise on both sides. This ensures even tension across the entire belt width.
Turn on the Tread after adjustments to test the belt movement. Run a slow test to observe how the belt tracks and moves during operation.
How often should I lubricate my Peloton Tread belt for optimal performance?
Peloton recommends checking belt condition monthly as part of regular maintenance. Lubrication frequency depends on usage patterns and environmental conditions.
Most users need lubrication every 3-6 months with regular use. Heavy users may require more frequent lubrication to prevent belt wear.
Signs that lubrication is needed include increased noise levels and rougher belt movement. Apply lubricant according to manufacturer specifications only.
Is there a standard cost for replacing a Peloton Tread belt, and what factors might affect it?
Replacement belt costs vary depending on warranty status and service location. Out-of-warranty replacements typically range from $200-400 including labor.
Factors affecting cost include belt type, installation complexity, and additional repairs needed. Some cases may require tensioner assembly replacement along with the belt.
Professional installation ensures proper alignment and tension settings. DIY replacement voids warranty coverage and may cause additional problems.
What should I do if my Peloton Tread belt starts slipping or becomes off-center?
Stop using the Tread right away if the belt starts slipping. This helps protect the motor and drive components.
You can realign the belt by adjusting the tension screws on both sides. Make small adjustments, then test the Tread after each one.
If the belt still slips after your adjustments, it's time for expert help. Reach out to Peloton support so a professional can take care of it.
Trust your investment to a master technician who knows you and your equipment. Note: Treadmill Maintenance Program coming soon!
The Concierge Maintenance Program includes:
Experience worry-free workouts with personalized service from a Certified Master Peloton Technician. Here's what you get with the program:
Thorough Inspection: David’s keen eyes and ears evaluate every inch of your bike and sound that it makes. This meticulous check ensures early detection of potential issues, preserving the bike’s lifespan and performance.
Hardware Integrity: Bolts, nuts, and screws on your Peloton bike’s screen, goose-neck, handlebars, cupholders, wheel cover, seat, inner and outer belt guards, stabilizers bars, foot pads, and nuts are inspected and tightened to precise specifications. This prevents unexpected loosening or breakages, providing a safe and sturdy workout environment.
Sensor and Resistance System Check: Ensuring these crucial components are working accurately guarantees your workout stats are reliable, and your resistance changes are smooth.
Front Hub and Axil Assembly Evaluation: This inspection safeguards the operational efficiency of your Peloton bike, ensuring smooth and fluid wheel movement.
Cadence Magnet Check: This ensures your pedaling speed is accurately tracked, enabling you to follow along with your workouts correctly.
Bottom Bracket Examination: Checking and tightening the bottom bracket to proper torque specifications ensures the bike’s structural integrity and prevents damaging wobble during intense workouts.
Touchscreen Optimization: By removing “bloat” data from the touchscreen memory, we enhance its responsiveness and speed, providing you a seamless user experience.
Belt Adjustment: A properly tightened and aligned belt ensures efficient power transfer from your pedaling to the bike’s mechanism, leading to an effective and smooth ride.
Crank Arm and Pedal Inspection: Tightening the left and right crank arms, inspecting pedals, and securing screw rivets ensures the stability of your pedal stroke, preventing potential injuries and maintaining bike longevity.
Proper Bike Calibration: This essential service ensures your bike’s resistance levels are accurate, offering you a consistent workout experience.
**Personalized Care: We’re always ready to answer any questions you may have, and are more than willing to look into any specific area of concern you may have with your Peloton equipment. Year round!
